

Authentication and authorisation can from time to time be the less favourable topics when it comes to working with REST APIs. Recently, I had a business problem which pointed me towards aligning the Power BI REST API to part of the solution to solve part of that problem.
We've heard of tools like the Centre of Excellence Toolkit and others for Power Platform which inventory the different objects, apps, flows and copilots that exist in the low-code platform, and then let us administer what is actually being built by makers in our organisations. However, we haven't got quite the same for the Power BI Service, and the CoE Toolkit doesn't include this content.
What if I told you, you can access some of this similar data using the Power BI REST API? Keep reading to understand authentication and authorisation, the first steps of getting to grips with the Power BI REST API for building your own solutions.
Creating an app
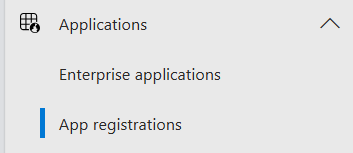
So the first step to being able to interact with Microsoft Entra secured APIs is to create an app registration in Microsoft Entra. To do this, we can go to the Microsoft Entra Admin Centre, accessible at entra.microsoft.com, then we can navigate to app registrations under 'Applications'.
Create a new app and give it a name relevant to the application you're developing or the solution you're building.
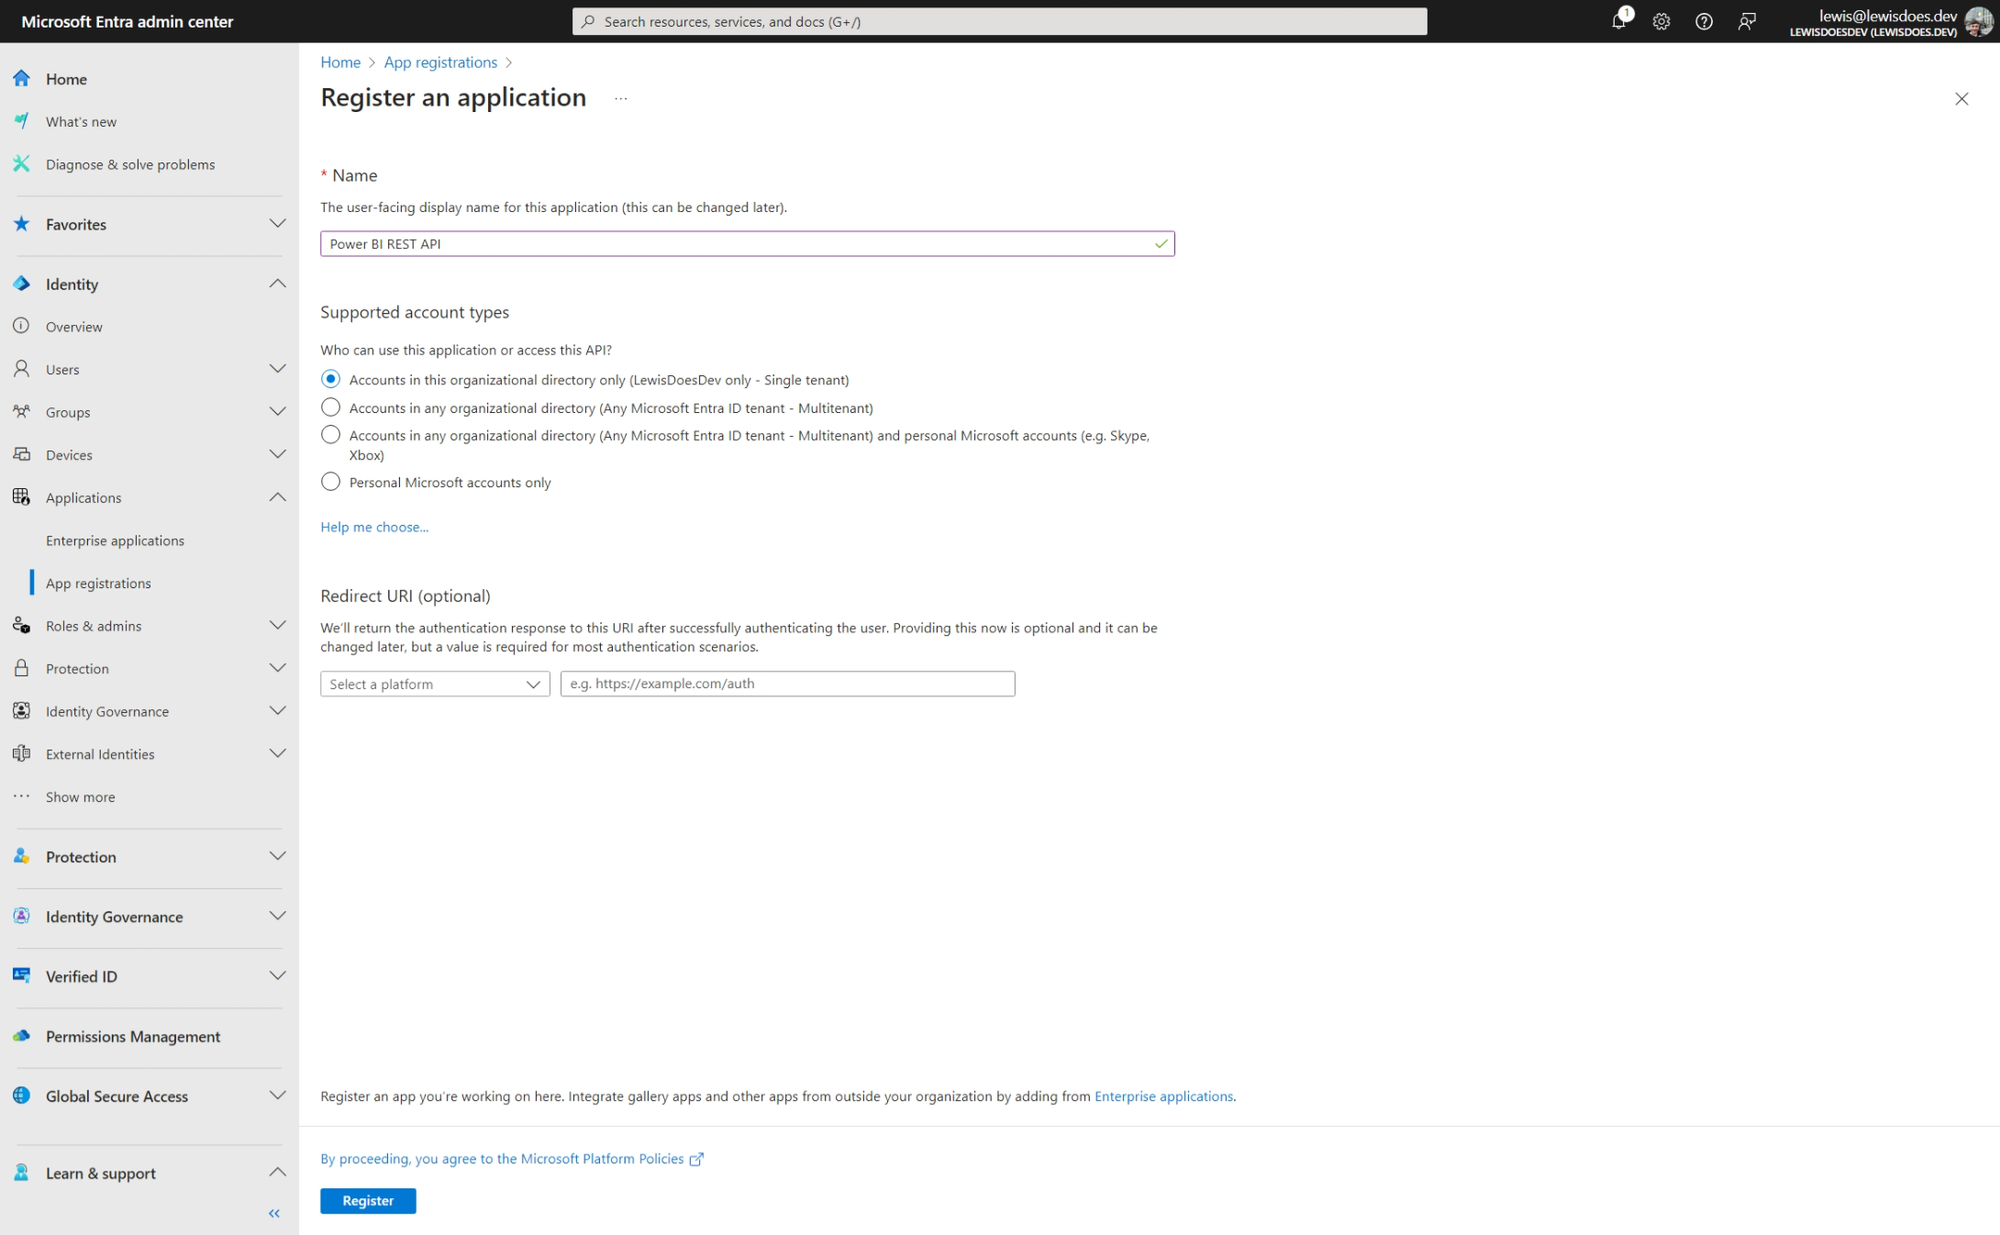
For demo's purposes I'm using a name relevant to the API I'm using. Set the supported account types relevant to where you wish to call the API from i.e. what user credential (this guide approaches this with delegated permissions to begin with).
From this stage, we can start adding delegated API permissions. This will result in users returning data they have access to for the relevant scopes, if they were to access it via app.powerbi.com, when making API requests.
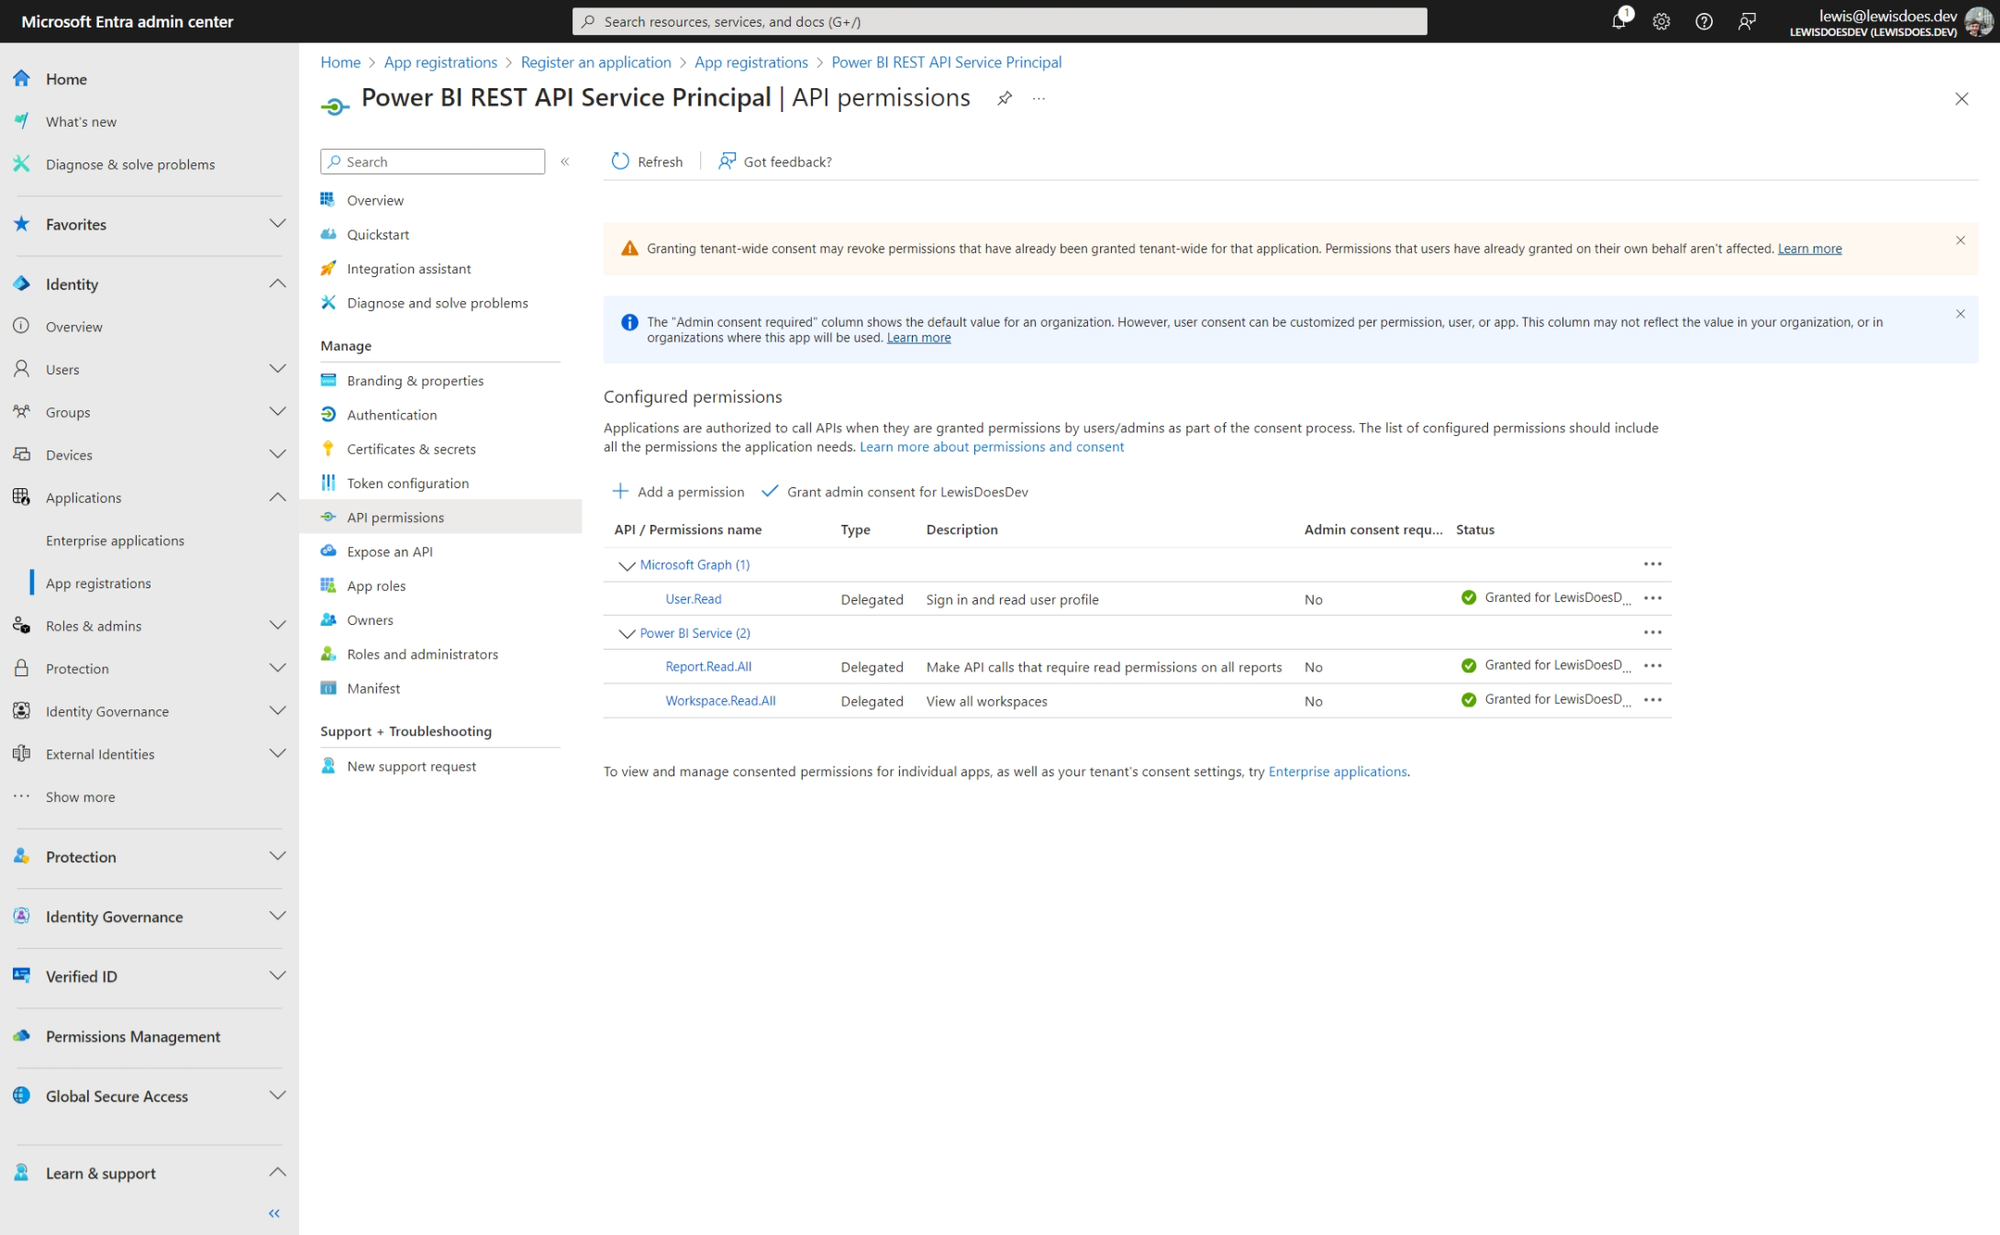
I'm going to add the Report.Read.All and Workspace.Read.All delegated permissions for the purposes of testing scenarios where I can return an array of workspace objects representing the workspaces I have access to in Power BI, and then for the purpose of returning reports for a workspace id I specify.
Testing things out in Postman
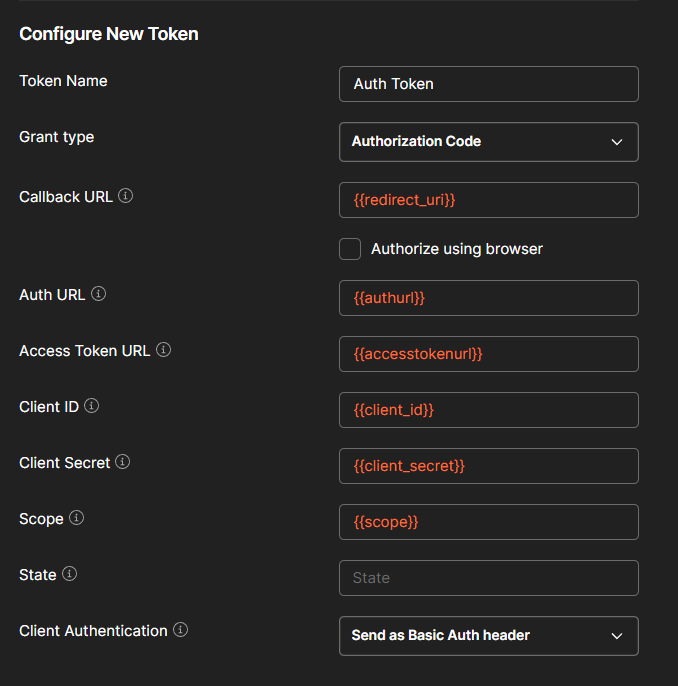
Okay now let's test things out in Postman. I'm going to create a new environment, and I'll add some environment level variables for authentication purposes including things like my client id and secret from my application.
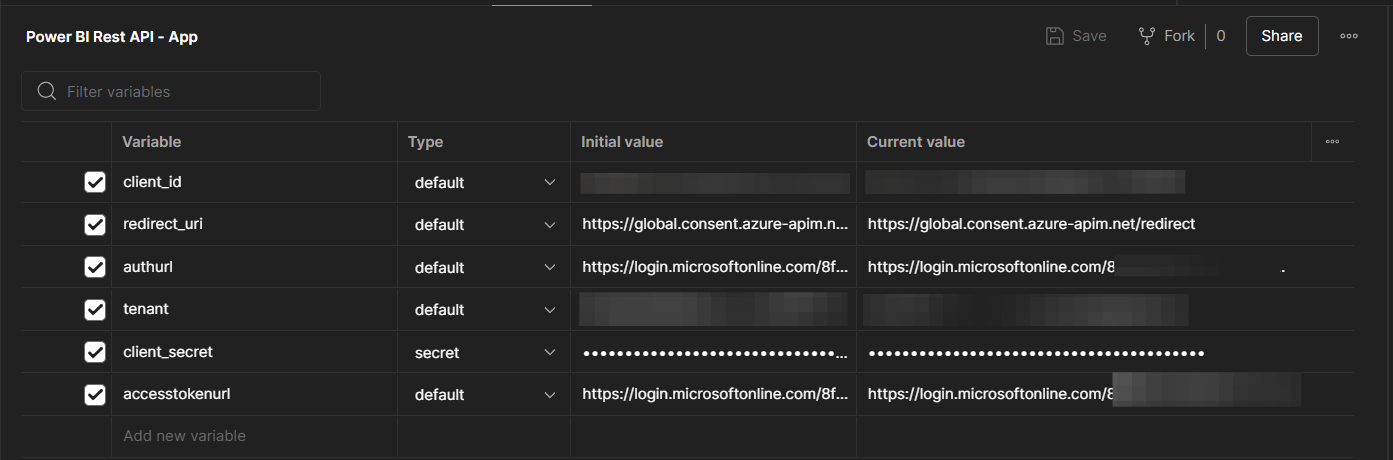
Add variables for your client id, tenant id, and a secret which you can create in your application in Microsoft Entra too. Then add the following variables and values:
Access Token URL: https://login.microsoftonline.com/{TenantID}/oauth2/v2.0/token
Redirect URI: https://global.consent.azure-apim.net/redirect
Auth URL: https://login.microsoftonline.com/{TenantID}/oauth2/v2.0/authorize
Now the next step, is to create a collection where we'll define some more scenario or request collection level variables.
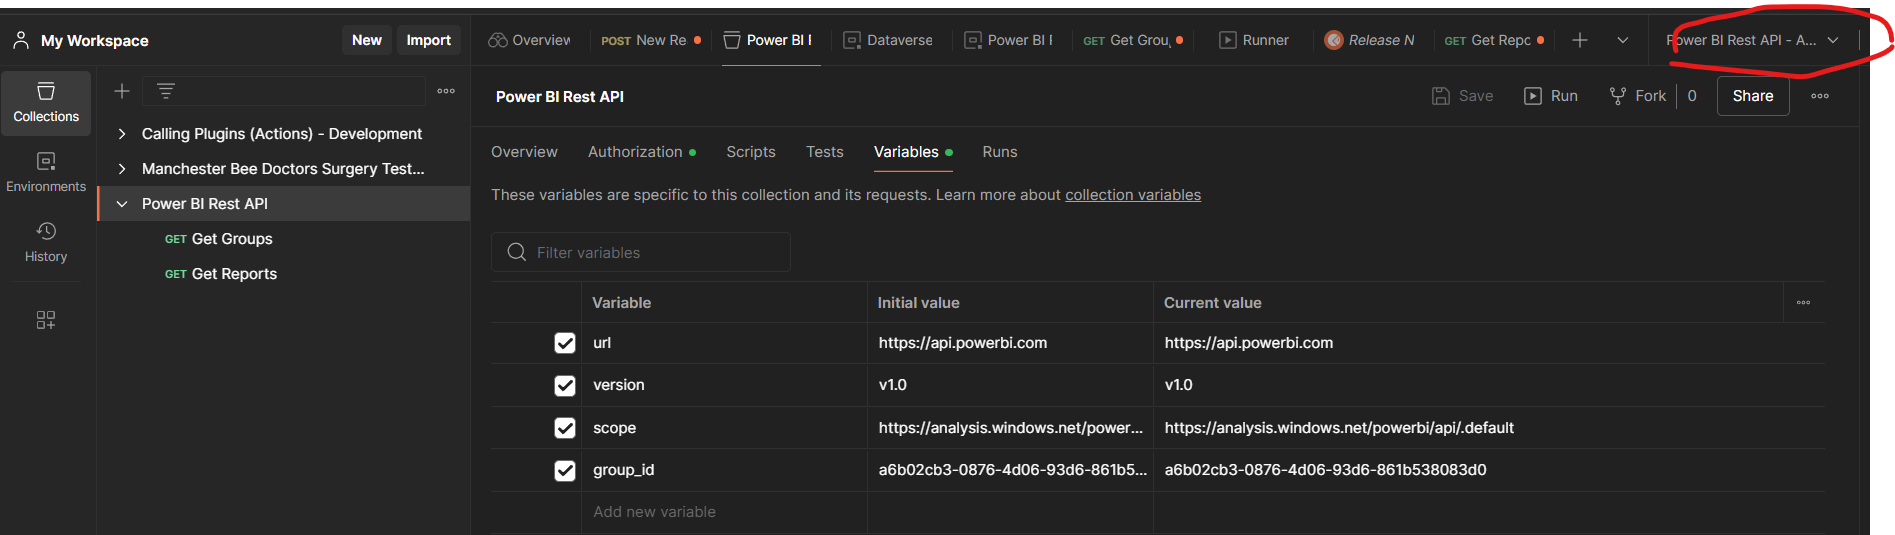
At this stage, add in the base URL of the API which is https://api.powerbi.com/, then add the version number which is v1.0, and the scope which is https://analysis.windows.net/powerbi/api/.default and finally add a group ID of a workspace for testing the Get Reports request.
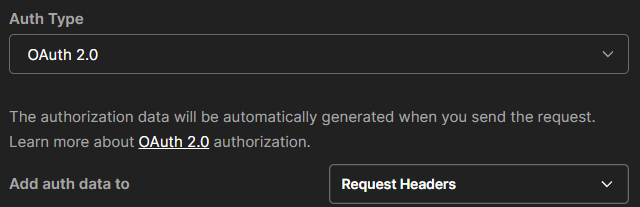
Once you've done this we can configure authorisation in Postman for OAuth 2.0. Select the Authorization tab. Set the auth type to OAuth 2.0.
Then configure these options for tokens.
Test things out by selecting 'Get new access token', which should result in you needing to sign in with Microsoft 365 credentials and a successful auth notification.
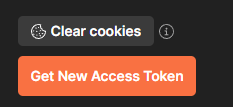
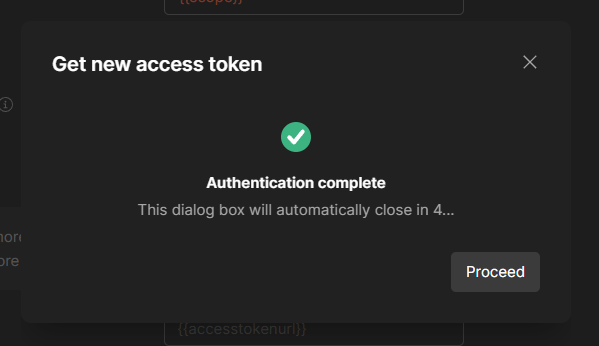
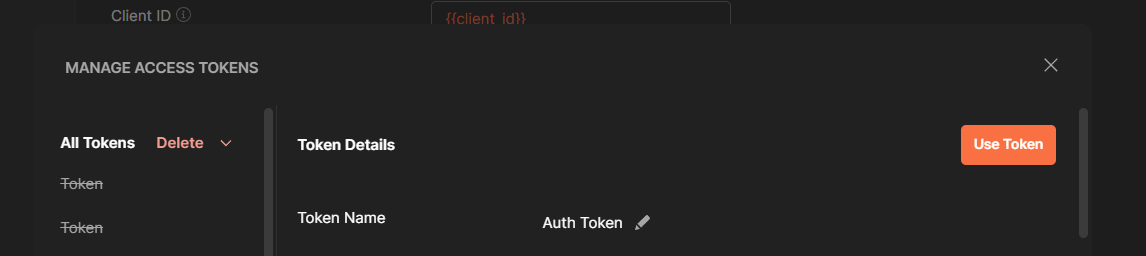
At this stage, click proceed and then select use access token.
Now we can test out some requests that are authorised within the scopes we have applied to our app in Microsoft Entra. Let's create a request to return workspaces in our new collection.
I'm going to set the method to GET, then the request URL to {{url}}/{{version}}/myorg/groups which will populate the first parts with collection level variables which I'd set.
Set the authorisation option to inherit auth from parent, and then send the request providing the environment is selected correctly. There you can then see, we get a successful response with a 200 status.

Want to try some additional requests?
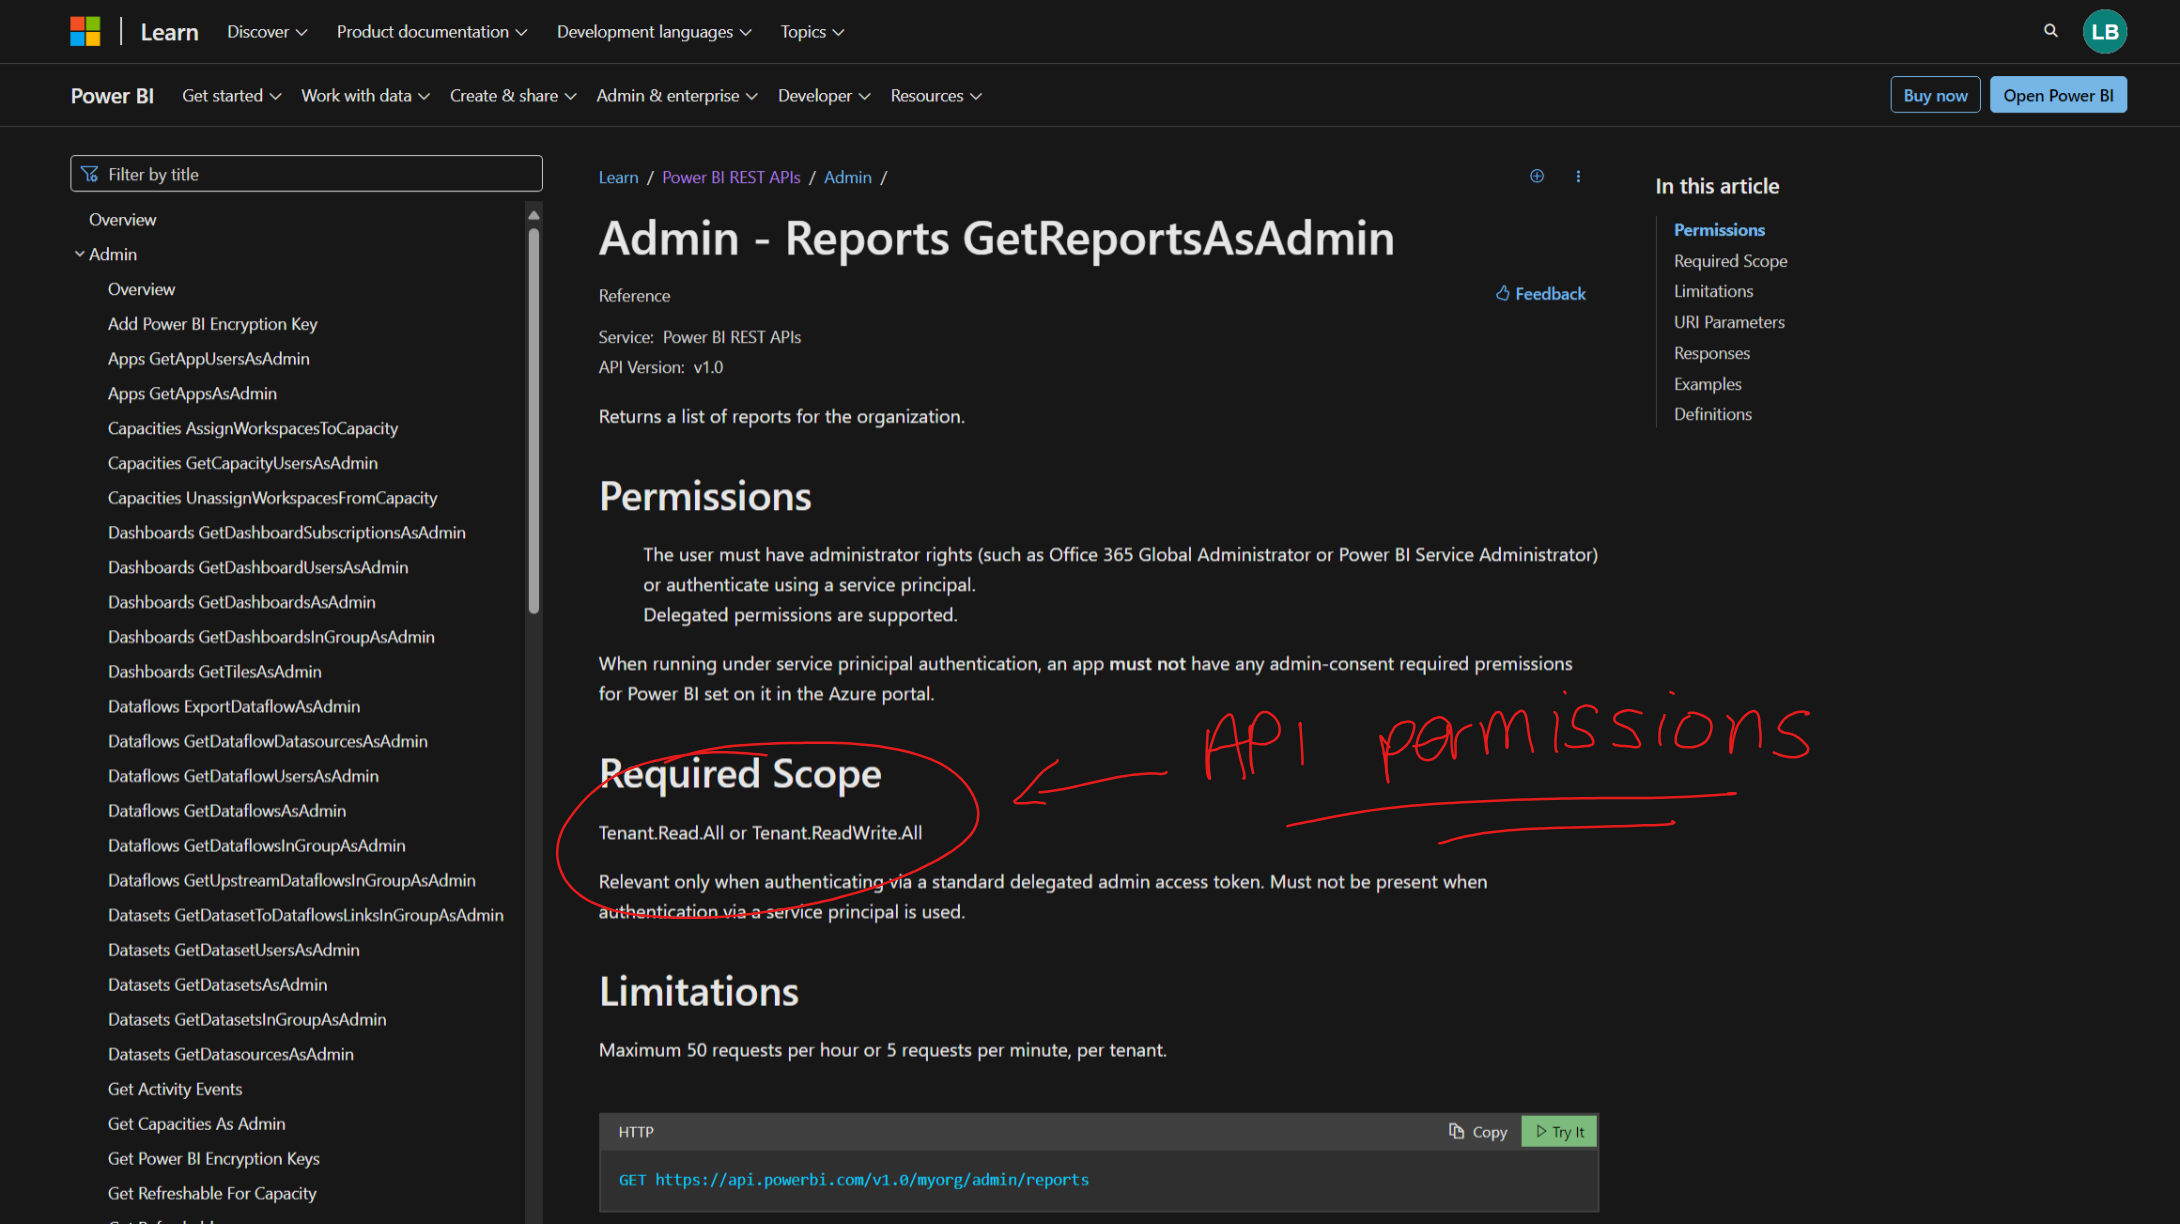
Did this example not meet your requirements for working with the Power BI REST API? No worries, you're not far off to working with other scopes and endpoints. Simply review the API documentation below, and check out specific request endpoint references which will highlight the required scope / API permissions which you'll need to add to your application in Microsoft Entra.

What about interacting from Power Platform?
Now being a Power Platformer at heart, of course the next step we'll take a look at is how to call this API like any other, from the Power Platform. Working with delegated permissions and bearer tokens securely, we'll opt to build a custom connector for this approach which I'll share how to do in my next blog post! Stay tuned friends. 📨